ANIIMO ATLAS

Find your next team.

Choose a ready composition, read the play sequence, then adapt it to your collection.

Atlas recommendations · 2026-10-03Skill-based plans. Encounter performance depends on your upgrades and execution.

11 ready compositions

LightningExploration · Boss encounters

Lightning: break and sustain

A role-complete starting plan: carry, energy, breaker and healer. It is not a measured best-in-slot team.

Use this team
Roles, opening & substitutions

Fulmintis Use the basic form as your main attacker. Critical-hit energy recovery rewards buffed attack windows, without requiring Prismana.

Besauce Restore resources before returning to your carry; keep the extra attack short and purposeful.

Blazen Build the break window for your carry. Use the critical-hit/Overcharged loop rather than treating Blazen as a second full-time DPS.

Glacy Cover health and contribute a team damage window without committing to a long attack channel.

Play sequence

  1. Recover as needed → Glimmer Shot → Blazen's break work → Fulmintis buff and channel; heal in response to damage.

Adjust your roster

Fulmintis → Fulmintis

If already owned; inspect the exact skill element and keep the same energy discipline.

Glacy → Glacy

Use basic-form Glacy for healing. It also has Glimmer Shot; check its own stats and equipped skills.

Watch out for

  • Requires managing four turns. Skip unnecessary setup against ordinary enemies.
  • These sequences assume access to each member’s full kit. In a Core-only assistant mode, only count the skills that mode actually exposes.
Link to this plan
LightningExploration · Boss encounters

Fulmintis: general support

The existing Turbo composition with an explicit Mist plan and a retained healer.

Use this team
Roles, opening & substitutions

Fulmintis Keep the Lightning channel setup for Lightning-focused teams. Prismana's extra element does not make every Light support useful to every attack.

Besauce Restore resources before returning to your carry; keep the extra attack short and purposeful.

Turbo Prepare Shrouded in Mist for the team buff. Cloud Shield protects Turbo itself; it is not a team-wide shield.

Glacy Cover health and contribute a team damage window without committing to a long attack channel.

Play sequence

  1. Prepare four Turbo basics for Nimbi Burst → recover energy as needed → Glimmer Shot → Fulmintis buff and channel.

Adjust your roster

Turbo → Blazen

When the encounter needs a dedicated breaker more than another buff.

Watch out for

  • No dedicated breaker. Cloud Shield protects Turbo, not Fulmintis; do not describe this as a team shield.
  • These sequences assume access to each member’s full kit. In a Core-only assistant mode, only count the skills that mode actually exposes.
Link to this plan
LightningExploration · Boss encounters
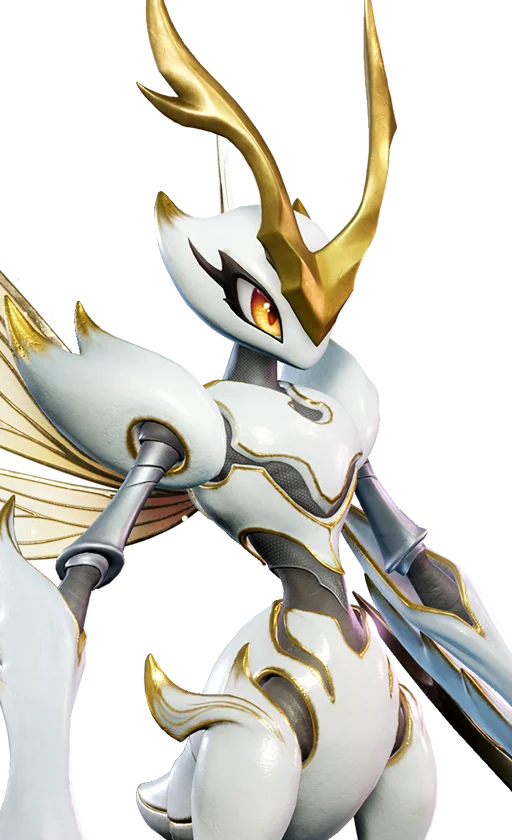
Fulmintis: Lightning field

Try a Lightning support window when the battle lets Luminelle use its full kit.

Use this team
Roles, opening & substitutions

Fulmintis Keep the Lightning channel setup for Lightning-focused teams. Prismana's extra element does not make every Light support useful to every attack.

Besauce Restore resources before returning to your carry; keep the extra attack short and purposeful.

Luminelle Pair with Lightning attackers, but distinguish the basic-attack buff from skill damage. Fulmintis's Storm does not receive a basic-attack bonus directly.

Glacy Cover health and contribute a team damage window without committing to a long attack channel.

Play sequence

  1. Recover energy → apply Luminelle's relevant buff and use its field only if ready → land Glimmer Shot → Fulmintis buff and channel inside the useful area.

Adjust your roster

Luminelle → Turbo

For broader support when the field or Lightning-specific benefits do not fit the fight.

Luminelle → Blazen

When breaking the target is the actual bottleneck.

Watch out for

  • The basic-attack buff is not a direct Storm bonus, and neither support ultimate is guaranteed in a Core-only assistant mode.
  • These sequences assume access to each member’s full kit. In a Core-only assistant mode, only count the skills that mode actually exposes.
Link to this plan
FireExploration · Boss encounters

Fire counter window

Three Fire members with a dedicated healer. Scorchhowl spends the burst window, Inferlupa pressures the break gauge and Flamerion manages the Fire-debuff recovery setup.

Use this team
Roles, opening & substitutions

Scorchhowl Use the counter window to prepare a deliberate burst instead of emptying EP whenever a skill is available.

Inferlupa Give the breaker time to build its trait, apply the Spirit setup, then return to your damage dealer when the opening appears.

Flamerion Recover resources before a large spend; avoid recovery at a full bar.

Glacy Reserve healing for missing health and the next dangerous phase.

Play sequence

  1. Apply Flamerion's Fire Debuff setup, use Inferlupa to create an opening, then time Scorchhowl's counter and charged strike. Return to Phantom Barrage after heavy EP spending; Glacy heals when needed.

Adjust your roster

Scorchhowl → Flameruff

Earlier progression damage slot; follow its own skill kit.

Glacy → Pranky

Earlier healer option; check the current heal tooltip.

Watch out for

  • This is a Fire-centered mixed team, not mono-Fire. Scorchhowl's elemental-advantage trait is matchup dependent. Do not spend every member's EP before an incoming danger phase.
  • These sequences assume access to each member’s full kit. In a Core-only assistant mode, only count the skills that mode actually exposes.
Link to this plan
GrassExploration · Boss encounters

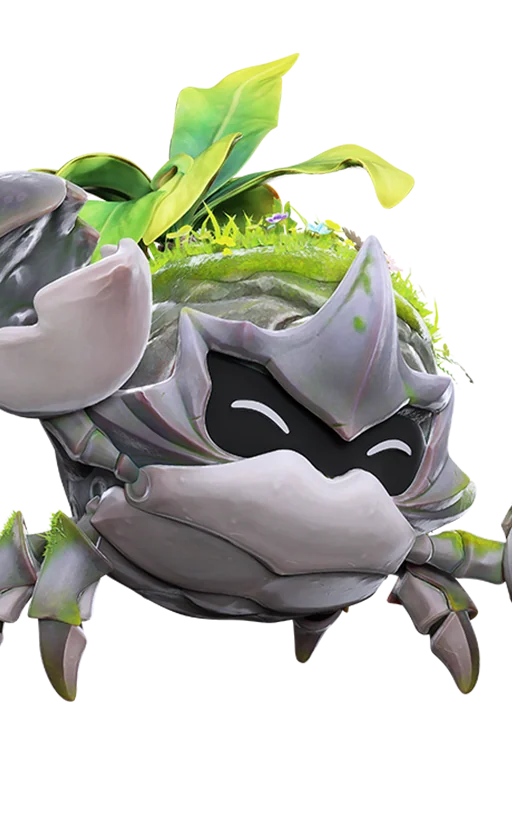
Grass sword garden

A Grass-centered rotation with a breaker, a field that restores Grass EP, and critical-hit support. Thornblade's basic attacks also fit Melloblum's cost-reduction mechanic.

Use this team
Roles, opening & substitutions

Thornblade Alternate skills and basics rather than treating basic attacks as dead time. Melloblum can support the Grass-critical plan.

Shrubclaw Create the break window, then return the turn to the main attacker.

Leafy Recover resources before a large spend; avoid recovery at a full bar.

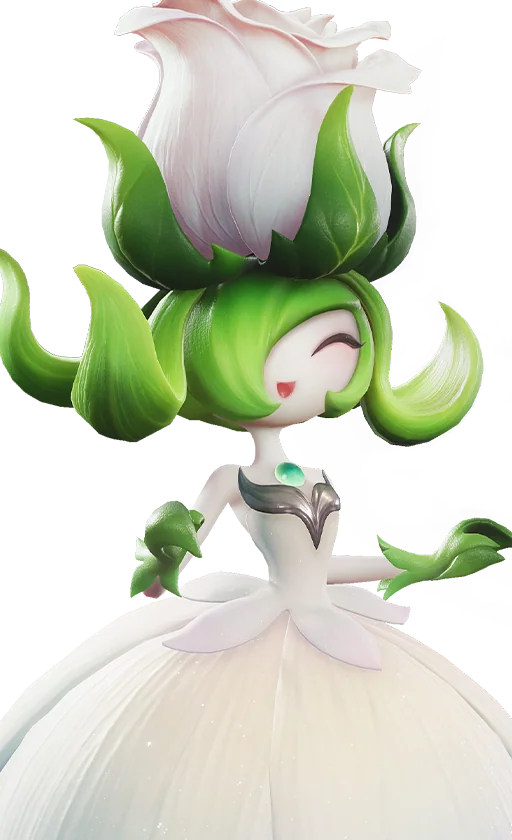
Melloblum Prepare the useful support effect before the attacker’s turn.

Play sequence

  1. Set Leafy's Cyclone of Leaves and Vitality Blooms, prepare Melloblum's support, and let Shrubclaw pressure the break gauge. Use Thornblade's Impact and basic-attack weave inside the useful support range.

Adjust your roster

Thornblade → Irisalis

Use the clone build for ranged play, while retaining Leafy's Grass recovery.

Melloblum → Glacy

Trade critical synergy for more direct healing when survival is the problem.

Watch out for

  • Leafy's EP field benefits Grass allies within range. Melloblum's Healing Rose depends on critical hits, so its healing timing is not guaranteed. Move the plan when the encounter forces you out of the field.
  • These sequences assume access to each member’s full kit. In a Core-only assistant mode, only count the skills that mode actually exposes.
Link to this plan
WaterExploration · Boss encounters

Water puddle cycle

A full Water lineup with puddle setup, healing and a bubble-based EP cycle. Use an opposite-sex Piopiota for Sherro and Panpanta if you want both conditional passives to contribute.

Use this team
Roles, opening & substitutions

Sherro Treat water setup as part of the build. Piopiota supplies puddles; Erlath supplies a Water-skill resource cycle.

Panpanta Create the break window, then return the turn to the main attacker.

Erlath Recover resources before a large spend; avoid recovery at a full bar.

Piopiota Provide water for Sherro while holding a heal for danger. Check teammate sex before counting the passive Water bonus.

Play sequence

  1. Place Erlath's Bubbles, create water with Piopiota or Panpanta, then build break pressure before Sherro's Water sequence. Detonate accumulated bubbles for recovery; use Surge as needed and rebuild consumed puddles.

Adjust your roster

Sherro → Sheldon

Progression replacement without copying Sherro-only skills.

Piopiota → Glacy

More direct healing, but Panpanta loses this team's Susuta-family partner condition.

Watch out for

  • Panpanta's entry bonus needs an opposite-sex Susuta-family teammate. Piopiota is in that family, but the sex condition must be checked. Healing and attack setup may compete for puddles; keep an emergency heal reserve.
  • These sequences assume access to each member’s full kit. In a Core-only assistant mode, only count the skills that mode actually exposes.
Link to this plan
WindExploration · Boss encounters

Wind: airborne barrage

Support Cornet’s channel with recovery, general buffs and a healer.

Use this team
Roles, opening & substitutions

Cornet Set up the Wind damage window, then channel while your energy and position allow.

Turbo Prepare Shrouded in Mist for the team buff. Cloud Shield protects Turbo itself; it is not a team-wide shield.

Besauce Restore resources before returning to your carry; keep the extra attack short and purposeful.

Glacy Cover health and contribute a team damage window without committing to a long attack channel.

Play sequence

  1. Prepare Turbo’s Mist and Nimbi Burst; recover energy if needed.
  2. Land Glimmer Shot, then use Cornet’s Scream Splitter into Wind Bomb Rush.
  3. Stop the channel to dodge and heal. Rebuild support before another safe flight.

Adjust your roster

Turbo → Blazen

Trade the general buff for a dedicated breaker; check the enemy matchup.

Watch out for

  • No dedicated breaker. Add one if gauge pressure is the bottleneck; flight increases Cornet’s risk.
  • These sequences assume access to each member’s full kit. In a Core-only assistant mode, only count the skills that mode actually exposes.
Link to this plan
EarthExploration · Boss encounters

Earth: overload window

Let Minespine open the gauge before Waleetle spends energy spinning.

Use this team
Roles, opening & substitutions

Waleetle Build momentum with movement and hits, then spend your spin in a break window.

Minespine Create the break window, then return the turn to the main attacker.

Besauce Restore resources before returning to your carry; keep the extra attack short and purposeful.

Glacy Cover health and contribute a team damage window without committing to a long attack channel.

Play sequence

  1. Recover energy, land Glimmer Shot and use Minespine to prepare the break.
  2. Build Waleetle’s Drift hits and Overload, then spin during the break window.
  3. Exit before exhausting your escape options; recover for the next opening.

Adjust your roster

Glacy → Glacy

Use basic Glacy for direct healing; it also has Glimmer Shot. Recheck the exact form’s stats and equipment.

Watch out for

  • Besauce supplies the recovery plan. Its Lightning resistance reduction does not amplify this carry’s non-Lightning attacks.
  • These sequences assume access to each member’s full kit. In a Core-only assistant mode, only count the skills that mode actually exposes.
Link to this plan
IceExploration · Boss encounters

Ice: stack and finish

Pair Glynsera’s stack consumer with an Ice breaker and a recovery pair.

Use this team
Roles, opening & substitutions

Glynsera Build Ice Debuff stacks before consuming them with Frost Tail Strike.

Geoclaw Create the break window, then return the turn to the main attacker.

Besauce Restore resources before returning to your carry; keep the extra attack short and purposeful.

Glacy Cover health and contribute a team damage window without committing to a long attack channel.

Play sequence

  1. Recover energy and use Geoclaw to pressure the break gauge.
  2. Land Glimmer Shot, apply Ice Strikes, and check the target’s Ice stacks.
  3. At ten stacks, use Frost Tail Strike; rebuild consumed stacks before repeating.

Adjust your roster

Glacy → Glacy

Use basic Glacy for direct healing; it also has Glimmer Shot. Recheck the exact form’s stats and equipment.

Watch out for

  • Besauce supplies the recovery plan. Its Lightning resistance reduction does not amplify this carry’s non-Lightning attacks.
  • These sequences assume access to each member’s full kit. In a Core-only assistant mode, only count the skills that mode actually exposes.
Link to this plan
DarkExploration · Boss encounters

Dark: shadow cycle

Keep Stellarys’s clone active while the support pair covers energy and health.

Use this team
Roles, opening & substitutions

Stellarys Keep your clone close and weave basic attacks after skills to use the short passive window.

Fragrancier Prepare the useful support effect before the attacker’s turn.

Besauce Restore resources before returning to your carry; keep the extra attack short and purposeful.

Glacy Cover health and contribute a team damage window without committing to a long attack channel.

Play sequence

  1. Use Fragrancier’s support and recover energy before the damage turn.
  2. Land Glimmer Shot, create Shadow Magic near the target, then weave Starfall and basic attacks.
  3. Refresh the clone after movement or expiry; avoid spending the short buff window on unnecessary setup.

Adjust your roster

Fragrancier → Blazen

Use a breaker when the gauge blocks your damage; Fragrancier’s support is removed.

Watch out for

  • No dedicated breaker. Keep within the clone’s range and use only Dark-relevant support benefits.
  • These sequences assume access to each member’s full kit. In a Core-only assistant mode, only count the skills that mode actually exposes.
Link to this plan
LightExploration · Boss encounters

Light: Solar Halo opening

Prepare Helion’s Halo while Inferlupa handles the break setup.

Use this team
Roles, opening & substitutions

Helion Prepare Solar Halo with basic attacks before spending the enhanced skill.

Inferlupa Give the breaker time to build its trait, apply the Spirit setup, then return to your damage dealer when the opening appears.

Besauce Restore resources before returning to your carry; keep the extra attack short and purposeful.

Glacy Cover health and contribute a team damage window without committing to a long attack channel.

Play sequence

  1. Recover energy and create the break opportunity with Inferlupa.
  2. Land Glimmer Shot, prepare Solar Halo with four basics, then use Holy Roar and Light Bombardment.
  3. Use healing for the dangerous phase and return to basics for the next Halo.

Adjust your roster

Glacy → Glacy

Use basic Glacy for direct healing; it also has Glimmer Shot. Recheck the exact form’s stats and equipment.

Watch out for

  • Besauce supplies the recovery plan. Its Lightning resistance reduction does not amplify this carry’s non-Lightning attacks.
  • These sequences assume access to each member’s full kit. In a Core-only assistant mode, only count the skills that mode actually exposes.
Link to this plan